 Firestone Technical Resources, Inc
Providing personal service for your impersonal technology.
News Articles
How to setup Exchange on the iPhone
One of the most common questions we get regarding mobile devices is how to setup an Apple iPhone with access to a corporate Microsoft Exchange mail system. This doesn't have to be a local system, it could be a hosted cloud Exchange server as well. Many people often will use a POP connection but this really doesn't allow the mobile device to exploit the full capabilities of the Microsoft Exchange services such as synchronizing contacts and calendars. So, get the full benefit of Microsoft Exchange by using the Exchange mail connector on the mobile device.
There are a couple of pre-configuration steps that you may want to take, especially if you have moved your Exchange service to a different hosting provider.
- Remove any old Exchange accounts that you don't plan to use.
- Power off and then power on the phone again.
- Turn off the WiFi feature.
You may be asking why are these pre-configuration steps necessary. First, you don't want interference of another Exchange account that is obsolete to get in the way. Second, powering off the phone clears the DNS cache so that it is forced to get new domain name information that may have changed since you last setup the phone. And last, the use of WiFi to connect to the Exchange server through a personal firewall may cause the setup process to fail.
Let's get started on setting up your Exchange account on your Apple iPhone. This process should work for most Apply iPhones.
- From the home screen, tap Settings.
- Scroll down to and tap Mail, Contacts, Calendars.
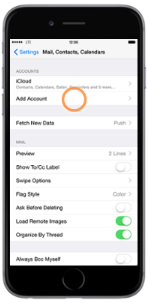
- Tap Add Account.
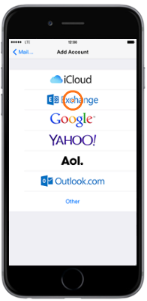
- Tap Exchange.
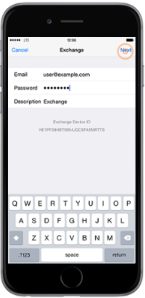
- Enter the account Email address and Password, then tap Next.
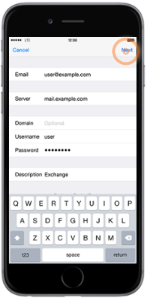
- Tap the Server field and enter the server address. Verify the other fields are correctly populated. Often the user name is the full user's e-mail address. When finished, tap Next.
- Tap the toggles to enable or disable the sync options, then tap Save.
- The Microsoft Exchange account is now set up.
Here are images that are associated with each step.
Step 1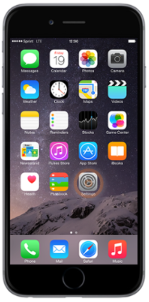 |
Step 2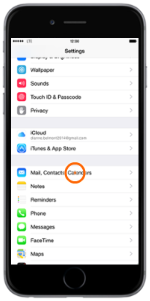 |
|
Step 3
|
Step 4
|
|
Step 5
|
Step 6
|
Step 7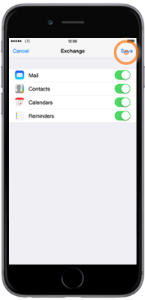 |
Step 8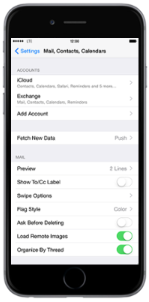 |
We hope that this information is helpful. Please let us know how this has helped you or if you have additional questions. As always Firestone Technical Resources, Inc. is here to help with your computer support issues - "Providing personal service for your impersonal technology."

Comments